- Floor Cleaning
6 Tips On Cleaning Vinyl Floors For New Homeowners
June 17, 2020
Vinyl flooring can improve the value of your home as long as you know how to take care of it. Here are tips on cleaning vinyl floors for new homeowners.
Did you recently move into a home with vinyl floors? Well, if you don’t have experience with vinyl floors, it’s time to do a bit of research. As a homeowner, it’s essential that you know how to take good care of every aspect of your home, especially the floors.
Avoid damaging your beautiful vinyl floors by cleaning them incorrectly. Cleaning vinyl floors requires a bit of a different process when compared to cleaning other types of floors.
To ensure your vinyl floors stay clean and in wonderful condition for years to come, continue reading below. We’ve put together a guide with 7 tips you should know about cleaning your vinyl floors.
1. Grab Your Cleaning Supplies
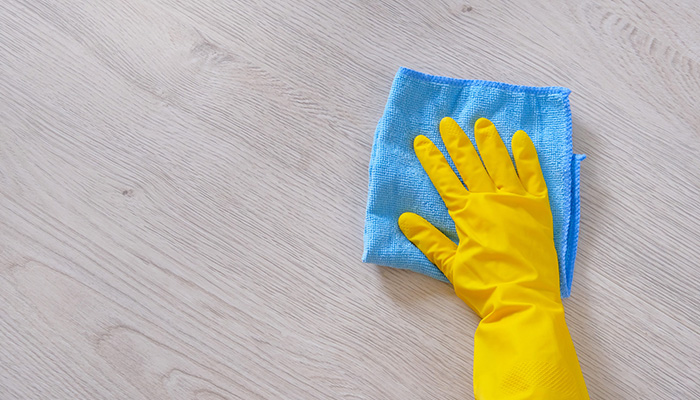
Before you begin the cleaning process, the first thing you need to do is ensure you have the proper cleaning supplies. You’ll want to grab your supplies needed to dust the floors, remove stains and scuffs, and wash the floors.
- A broom and a vacuum
- A bucket
- A microfiber cloth
- A few rags
- A microfiber mop
- Baking soda and vinegar
- A commercial vinyl cleaner
- Dish soap and water
Gather all of these supplies and keep them nearby so you don’t have to run back and forth to grab certain items while you’re trying to clean. Once you have everything together, you can then move on to the next step.
2. Sweep the Dust and Dirt Away
Before you use any type of wet-cleaning methods on your floors, first begin by sweeping and vacuuming them. You can choose either to use a broom or a vacuum to complete this step. You can also consider using both by sweeping first and then vacuuming after.
You’ll want to sweep or vacuum the dust and dirt away, this gets rid of any loose debris on your floors that a wet mop would only spread around or make sticky. If you do decide to use a vacuum on the floors, then you need to be sure to have it on the setting for hard floors to prevent it from leaving scratches.
Once the floors are swept clean, you can then work on removing any stubborn stains.
3. Remove Those Tough Stains
If you notice a stain or two after sweeping your floors, then you’ll want to use a commercial pH-neutral floor cleaner or a baking soda solution to remove them with ease. A pH-neutral floor cleaner is ideal for vinyl floors because it’s not too harsh and can clean them without damaging them.
When using the floor cleaner, mix it with a bit of warm water and lift the stain away. If the stains are more stubborn than you thought, then you can use the baking soda solution. Take baking soda and mix it together with a bit of warm water as well.
This will create a paste. Apply the paste to any stains and allow it to rest for a bit. Use a soft cloth to then scrub the stain away. Repeat this process if the stain still remains.
When done, use a clean soft cloth with a bit of warm water to clean away the leftover baking soda residue. If you discover a few scratches, then take a sponge and buff the scratches out.
4. Mop The Floors Clean
Next, use a microfiber mop to then mop the floors clean. You can use a commercial vinyl floor cleaner or you can make a solution at home. If you want to make your own solution, then you’ll need to grab the vinegar and dish soap.
Take a bucket of hot water and mix in one cup of white vinegar. This is all you need to make a good cleaning solution. If desired, you can add in a few drops of dish soap, but don’t go overboard.
Take your mop and place it into the bucket with the solution. Be sure to wring out the mop well enough to be damp but not soaking wet. Excessive water on the vinyl floors can damage them.
5. Rinse Well When Done
When you’re done cleaning the floors, you should then take another microfiber mop and dip it into a bucket of warm water. Use this mop to rinse the floors well. Any soap left behind on the floors will leave a film and will actually attract dirt to it.
Remember to wring out the rinsing mop well to avoid excessive water. When you’re done rinsing the floors, you can allow them to air dry or dry them using a soft clean cloth.
6. Set Up a Defense Mechanism
Now that your floors are cleaned, it’s time to talk about preventative measures to help keep them shinning for as long as possible. When placing furniture on the floors, be sure to place protectors on the legs of the furniture pieces to prevent scratching.
You can also lie down rugs in areas where there is heavy foot traffic. Aside from these measures, also take the time to sweep your floors on a regular basis.
This Is Cleaning Vinyl Floors Made Simple!
With these tips by your side, you can now begin cleaning vinyl floors with ease. Are you ready to install new vinyl flooring now that you know how to take good care of it?
Contact us today to get a free in-home estimate!
You Might Also Like
Get Your
FREE
In-Home
Flooring Estimate